Pages

Friday 27 November 2015

Blondies. I'd call them 'Dumb Brownies but that's not PC.

Blondies - the lighter, less chocolatey version of Brownies, but even better with a cuppa good coffee.  VERY easy to make and hardly any washing up.  My kinda cake.

You will need:
  • 115g of butter
  • 100g of packed soft brown sugar (packed means straight from the bag, not loosened up)
  • 2 Eggs
  • 225g of plain flour
  • 1/2 tsp of salt
  • 2 tsps of baking powder
  • 1 tsp of vanilla extract
  • 150g to 180g of good, dark chocolate chunks or broken squares.
  • 75g of sliced almonds
  • Handful of chopped walnuts or pistachios or...

How to make:
1.  Pre heat oven to 180degC (fan 160) and prepare (grease with butter and line the bottom) a baking pan about 10" square. 
2 - In a pot big enough to hold about 6 pints of water, melt the butter over a low heat until just melted.  Do not overheat the butter - you're about to add raw eggs and you don't want them to scramble.
3  - Add the sugar and eggs (take them out the shell first smarty)
4 - Stir through and then beat until well blended.
5 - Stir in the next 4 ingredients and then fold in the chocolate chunks and almonds.
6 - Spread mixture into prepared tin and evenly distribute.  Sprinkle with the nuts.
7 - Bake in centre of oven for 30 minutes or until the old toothpick comes out clean.
8 - Cool on wire rack and then cut into 16 squares (if using a 10 x 10 inch tin).
9 - Make a good cup of coffee and use to wash down 2 or 3 Blondies when cool enough to eat, but not cold.

Remove from tin and leave to cool on a wire rack.

While cooling, make a good cuppa coffee and then cut into squares and eat a few while still warm.


Wednesday 18 November 2015

A Carrot Cake, too 'carroty' for rabbits.

Carrot Cake.  A wee bit of planning and effort, but not too much.  Relatively easy to make and guaranteed to impress.  Add a glass of bubbly and you're in like Flynn, or Flynnetta.
It's a Carrot Cake - It's meant to taste good, not look pretty.  I don't do pretty, you can't eat pretty.

Read this recipe right through BEFORE attempting it.

You will need 2 x 9inch loose bottomed cake tins, lightly greased with butter and the bottoms lined with greaseproof paper.

For the Cake.
  • 400g of plain flour
  • 1 tbsp of baking powder
  • 1/2 tsp salt
  • 2 tsp of cinnamon
  • 1/2 tsp of allspice
  • 1/2 tsp of mixed spice
  • 100g of soft brown sugar
  • 100g of dark brown sugar
  • 3 large eggs
  • 200ml of vegetable oil
  • 100g of carrot puree (boil carrots until soft and then blitz in a mini blender or mash through a sieve)
  • 250g of coarsely grated carrot
  • 100g of raisins or sultanas (I like to soak mine overnight in some brandy or rum or..)
  • 150g of coarsely chopped walnuts (or pecans)  Save 50g for topping the cake
  • 100g of flaked almonds  Save 50g for topping the cake
  • 75g of dessicated coconut
  • 100g of chopped pineapple (rings or chunks, squeezed to get rid of a lot of the excess juice)
  • Zest of an orange, some chopped candied orange peel or a tsp of good quality orange extract.  Whatever you have
For the Frosting/Icing/Covering and filling.
  • 150g of unsalted butter at room temperature.  Hopefully your room is warm as the butter needs to be soft.
  • 60g of icing sugar
  • 300g of cream cheese
  • 1tsp cinnamon
  • 1tsp vanilla extract

Preheat oven to 180deg C or 160deg C for a fan oven.

1.  Put the sugars, eggs and vegetable oil into a large bowl and whisk until well mixed and sugar is mostly dissolved (at least no lumps).  Don't even think about using a hand whisk - use an electric beater. Start slow and then increase the speed as you get things mixing.
2.  Add the flour, baking powder, salt and spices to the sugar mixture and mix well until all incorporated.
3.  Add all the rest of the cake ingredients and mix well.
4.  Divide the mixture equally between the 2 prepared cake tins.
5.  Put both tins into the oven on the same shelf.  And if now is the time that you are cursing me because your oven is too wee - not my fault, you should have read the recipe through like I told you at the beginning.
6.  Bake for about 30 minutes or until cakes show signs of shrinking away from the edges of the tins and a toothpick comes out clean.  Yes, the old 'toothpick' trick, again.
7.  Remove cakes from oven and leave to cool slightly in the tins for about 10 minutes, then remove them with the loose bottoms and slide them onto a wire rack to cool further.  After a wee while, slide the cakes off the cake tin bottoms onto the wire rack to cool completely.  When fully cold (and not before), remove the greaseproof paper from the bottom of the cakes.
8.  While cakes are cooling, make the frosting.  Beat the butter and sugar together until smooth.
9.  Add the cream cheese and beat into butter mixture.  Make sure it is very smooth.
10.  Add the cinnamon and vanilla extract and mix them in well.  Leave in the fridge to firm up for a wee while.
11.  When the cakes are cold, top one of them with about half of the frosting, spread evenly across the cake.  Place the other half on top and cover the top of that one with the rest of the frosting, again spread evenly right to the edges.  Top the cake with the remaining nuts.  You DID remember to save 50g of each of the nuts like I told you to?
12.  Make a good cup of coffee, cut a slice of cake and take a break.  While you are relaxing, start planning who you will seduce into bed with this cake.  Probably the best cake in the world.  Oh wait a minute,for that to be true it might need a bit more alcohol in it next next time.

ENJOY!

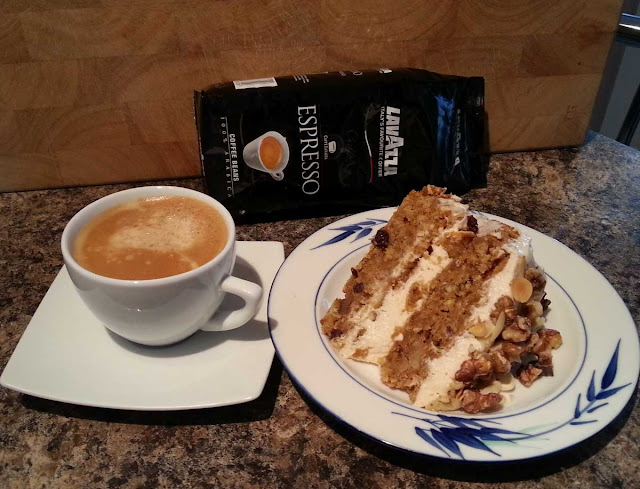
Serving Suggestion :-)

Thursday 5 November 2015

Pizza, Pizza, Pizza - the big tops. Part Two.

Pizza Toppings part 2 - just for a feature of interest and a quick run through.  Well, really it was just to keep part one shorter so you didn't fall asleep.

Sauce, Truffle Oil, Red Pepper, Oregano, Fresh Mozzarella, Basil, Sautéed Onions, Grated Mozzarella, Anchovies, Capers, Black Olives, Salami and Garlic, Fresh Parmesan and Mushrooms.


Sauce, salami, cheese, garlic, olive oil - ready to go into the WFO.
Coming soon - how to cook pizza to perfection.

Pizza, Pizza, Pizza - the big tops. Part One.

Ok, now that you have your dough and your sauce made you're ready to go and build a pizza.  Be scared, be VERY scared as the pizzademons know you are coming and if you don't come prepared then they'll smack you.  So get prepared!  As chefs would say, get your Mise en Place ready to go, or as Anthony Bourdain calls it, his meez.  At this point, to help keep the pizzademons at bay, a large glass of whatever kind of (good) wine that will go with your master creation should be poured and put to one side within easy reach.  If you're not a wine drinker (become one before you get too much older) then a large, very cold glass of your favourite beer will do but you need to add 2 peeled cloves of garlic on a thread hanging round your neck as well.  Good Luck and Buona fortuna.

From this point on you you need to think like an old world Italian, better still like a 'Napoletano'.  If for some reason you came to this blog thinking 'deep pan' or 'Chicago style' then drink your beer, suck on the garlic gloves and get back on your horse now, cowboy.  This is old school pizza - you should haver figured that out a few posts ago when I asked you to spend so long making your own dough and sauce from scratch.  Did I ask you to buy a ready made, deep pan piece of carpet underlay and a jar of Dolmio pizza sauce - did I?  If you're still here and reading this then, PHEW!! at least we are still 'on the same page' and thinking about real, pizza.  The kind that Giuseppe makes all his life and that we want to make and get as close as we can to 'Verace Pizza Napoletana' or Authentic Naples Pizza.

Enough yakking, let's create a pizza.  First, some toppings for your meez.
Some toppings - I used these for the pizza stone pizzas (coming later).  Clockwise from L-R as best I can.  Mushrooms, garlic oil, oregano, capers, black olives, the sauce, grated mozzarella, anchovies, salami, fried chicken breast pieces.
Now, let's get your bases ready to go.  Take one of your dough balls and... well I've just thought of another step I might need to put in here - how to stretch your pizza dough,  Damn, that will have to come later and you'll have to bare with me for now.

Turn out your ball of dough onto a lightly floured, smooth work surface.  Sprinkle more flour on top of the ball and then use your finger tips to flatten the ball and push out to shape.  Using only your finger tips at this time, use a flattening/pushing action while at the same time rotating the dough to try and keep it roughly round.  Do not use a rolling pin, you will regret it - just don't do it.  Once your pizza base is about 8 inches or so diameter, it will become harder to get much more shaping out of it with just your fingertips.  Start to use the flat of your hands and push and twist the pizza to stretch and rotate it at the same time.  You really need to 'feel' this and you are aiming for an even, thin base across more than 10 inches of the base with a thicker edge to the dough about a half inch to an inch wide at most all the way around the pizza.  (Idiot guide - 10+ inches of thin base across the centre of the pizza and an average of a one inch 'border' will give you about a 12 inch pizza)

I like to put my bases onto those thin plastic chopping boards (you can buy them in supermarkets) for moving about the work area.  I like to prepare all my bases first and then add the toppings.  I usually prepare 4 bases and then allow them to rest a little while before using them.


Next, it's time to get creative and this is now up to you.  Add some sauce and spread it about the base from the centre out but leaving the thicker edge clear.  You only want enough sauce so that the base is thinly covered.  If you were to turn the base upside down then almost nothing would fall off, it's that well spread out.  Then add the toppings of your choice.  Again, less is better and please, generally not more than 2 or 3 main ingredients as the focal point for your pizza with some other 'flavour/texture' toppings.  The more toppings you pile on the linger they take to cook - and pizza should cook quickly.  You'll see what I mean later.
Chicken, mushroom, capers, black olives and cheese with a little garlic oil on to.  Ready to cook.
There you go, a pizza ready to go into the oven.  Cook until it's ready in the hottest oven you have.  On a pizza stone in a domestic oven or right on the hearth of a wood fired oven.  That and more, coming soon.